Halloween decorations Photo credit: Teresa Watkins
Average temperatures High 85 Low 65
Average rainfall is 2.73 inches
October plantings
Vegetables: Beet, broccoli, Brussels sprouts, cabbage, carrot, cauliflower, celery, collards, kohlrabi, lettuce, mustard, onion, peas, potato, radicchio, radish, rhubarb, roquette, rutabaga, spinach, strawberry, Swiss chard and turnip
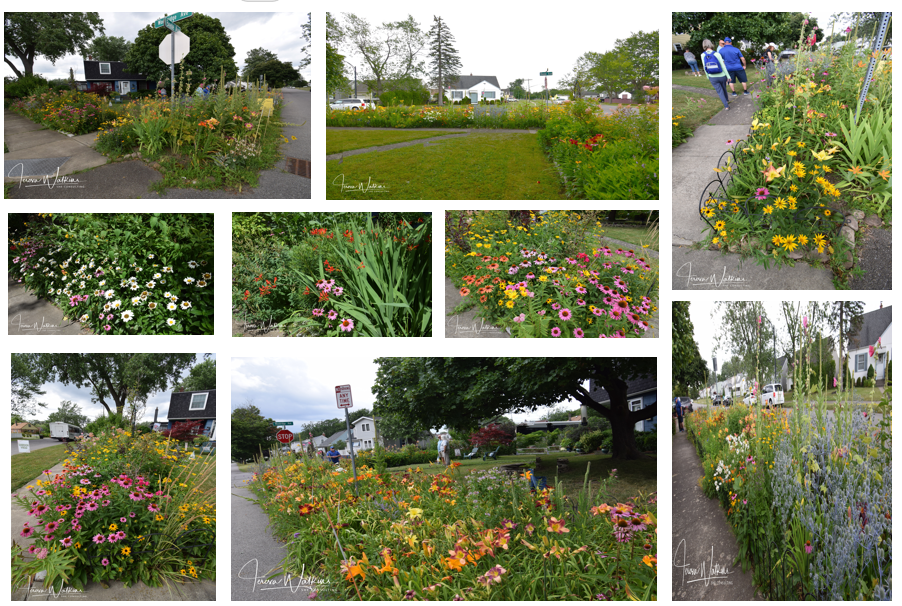
Flowers: African daisy, alyssum, angelonia, ageratum, begonia, black-eyed Susan, blue daze, calendula, candytuft, celosia, chrysanthemums, cleome, coleus, cornflower, cosmos, dianthus, dusty miller, gaillardia, gazania, geraniums, gerbera, heliotrope, hollyhock, impatiens, larkspur, lobelia, nicotiana, pentas, petunia, salvia, snapdragon, sunflower, sweet pea, verbena and zinnia.
Herbs: Anise, basil, bay laurel, borage, cardamom, chervil, chives, coriander, dill, fennel, garlic, lavender, lemon balm, lovage, mint, nasturtium, oregano, rosemary, sage, sweet marjoram, tarragon, thyme and water cress.
Bulbs: African lily, agapanthus, amaryllis, anemone, bulbine, calla, crinum, day lily, gingers, gladiolus, pineapple lily, rain lily, society garlic, spider lilies, walking iris, watsonia. Refrigerate crocus, daffodils, hyacinth, narcissus, and tulips for forcing.
Grasses: Lomandra Breeze, Miscanthus ‘Adagio’, Muhly Grass, Dwarf Fakahatchee, White Fountain Grass, Lemon Grass.
Lawn care
Get a soil test from the UF Soil Laboratory before fertilizing to know what nutrients to apply.
Have the soil acidity tested.
Apply lawn fertilizer to regreen the turf.
When applying fertilizer, follow label instructions.
October is the last feeding for Bahiagrass, centipede, and zoysia lawns this year.
Apply fertilizer and herbicides separately.
Regreen lawns that continually have a yellow look with an iron or minor-nutrient application.
Herbicide-only products may be used following label instructions for your lawn type.
Herbicides may not control all weeds; pull, dig or use non-selective spot sprays as labeled.
October through Spring is a good time to install sod.
Fill bare spots in lawns left from summer pests with sod or plugs.
Seeding time for bahiagrass is over; delay rye seedings until temperature highs are in the low to mid-70’s.
Chinch bugs and sod webworms can linger into Fall; control as needed
Water turf when it shows signs of moisture stress.
Use soil aeration in older, compacted, and poorly-drained soils to encourage better root growth.
Continue mowing to maintain proper turf height; keep mowing height the same year-round.
Sharpen & balance mower blades to give a smooth cut to leaf blades.
Change the oil and air filters of gas-powered equipment for Fall.
Use mulch or ornamental ground covers in areas where turf won’t grow.
Vegetable and fruit tree care
Harvest pumpkins this month. Look for dying leaves and vines, deep color, and hardened stem and rind.
Use large transplants of tomatoes, peppers, and eggplants to get a Fall crop.
Stake or trellis tall or vining crops to keep the edible portions off the ground.
Feed gardens every 3 to 4 weeks with a traditional fertilizer or use a slow-release product.
Tomatoes begin setting and holding their fruits early to mid-month.
Add flowers to vegetable gardens to attract pollinators.
Prevent spray damage to pollinators; apply sprays when they are not active.
Caterpillars feed on cucumbers, melons and tomatoes; control with a natural spray.
Begin plantings of cool season vegetables around mid-month.
Gardeners cramped for space can grow vegetables in containers.
Start seeds for transplants of broccoli, cauliflower, and similar vegetables in containers.
Add a mulch to the surface of the soil to conserve moisture and keep vegetables dirt free.
Groom summer weary herb plantings and start new ones that prefer the cooler weather.
Most vegetables & herbs need a moist soil; water when the surface begins to dry to the touch.
Fruit splitting on citrus trees is normal and may continue into the Fall.
Help prevent citrus fruit drop and splitting, water once or twice a week during dry weather.
Give citrus the final feeding of the year during early October.
Till new garden sites and enrich sandy soils with garden soil, organic matter and manure.
Remove offshoots from pineapple plants to start new beds.
Start papaya seedlings for late winter transplants.
Add strawberry plants to a garden or build a pyramid for planting.
Delay pruning all fruit plantings until mid to late winter.
Speed up the composting process by turning the piles monthly.
Harvest maturing chayote, cocoyam, dasheen, and gourds.
Dig in the soil to check sweet potato plantings; most have roots ready to harvest.
Landscape chores
Recycle dead shrubs and branches in your Halloween landscape.
Many plants produced late summer growth; prune to remove out of bounds shoots.
Major pruning time is over for azaleas, bougainvillea, camellias, gardenias, and poinsettias.
Shield poinsettias and holiday cactuses from nighttime light starting mid-month.
Shrubs, ground covers, and perennials, are ready for a final Fall feeding.
Use a slow-release fertilizer that can feed in-ground and container planting for months.
Most ornamental and shade trees do not need a special feeding
Give palms a final feeding of the year with an 8-0-12-4mg fertilizer or similar product.
Palm diseases are prevalent; clean and sterilize pruners between palms.
Be smart and only remove the brown fronds and flower stems from palms.
Give hedges a final trimming.
Remove suckers and low limbs from trees.
Weeds are plentiful in ornamental plantings; hand pull or spot kill to prevent seeding.
Whiteflies and mealy bugs are major pest; systemic insecticides offer good control.
Drier weather lies ahead; water when the surface soil begins to dry.
Most established trees and shrubs can go a week or more between waterings.
Trim away limbs and weeds affecting the operation of sprinkler systems.
Check container plantings for plugged drainage holes; repotting may be needed.
Maintain mulch under trees and shrubs; start the mulch several inches from trunks.
Determine tree needs and plant smaller growing wind resistant species.
Check tree and palm supports to make sure they are secure but not damaging the plants.
Add Fall plants to hanging baskets and container gardens.
Edge sidewalks and plant beds.
Replace soil in problem flower beds and planters.
Replant flower beds with cool season annuals and perennials; delay pansies until November.
Start Pansy and other winter annual seeds now for planting in November and December.
Divide perennial and bulb plantings.
Give water lilies and bog plants a monthly feeding.
House & foliage plant care
Order gift amaryllis to be delivered in December for Xmas.
Plants reduce pollutants and create a pleasing atmosphere when added to homes and offices.
Foliage plants are often a good buy at garden centers during Fall; replace declining plants.
Many foliage plants have grown too large for their containers; repot as needed.
Groom outdoor foliage plants and begin moving them to a warm location.
Most foliage plants need a bright light location but out of the direct sun.
Feed plants in bright light monthly; less often in low light.
Control insects on plants before moving them indoors.
Water holiday cactuses only when the surface soil dries
Begin forcing amaryllis and paper white narcissus for indoor displays and discontinue feedings.
Make sure indoor poinsettia, holiday cactuses and kalanchoes receive no nighttime light.